Tuesday 27 November 2012

Princess Serenity - Inspiration

This past Halloween, I did my usual shopping. I never buy finished costumes, for obvious reasons... but certain accessories are just better to purchase. I always hit up the Halloween stores, as well as the dollar stores, box stores, drug stores, grocery stores... every store! in search of any little items that I might need for existing or future costumes.


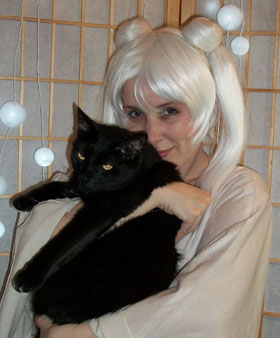
I was in Value Village looking for another foam head, as I had purchased one from there last year. I didn't find the foam head, but I did find a Sailor Moon wig! Tee hee!! If I had found this a few months ago, I might have considered doing a Steampunk Sailor Moon instead of Sailor Mars. Oh well. It is nice to have one of the other characters. I think everyone does Sailor Moon.

I snatched up the wig, happy to have found one that I didn't have to order from ebay. I am still reluctant to order things online, even though it has become easier and safer in the last few years. It still makes me nervous. This is a cheap wig, and the odango need some fixing, but it gives me a starting point, for sure.
Queen Serenity Cosplay Wig
I would love to have one this colour, in keeping with the manga version. 
I actually just stumbled onto this woman's website where she sells these wigs.
So far, I am pleased with what I see.... I may end up buying one from her....

Having a usable wig is inspiring me to start work on a Princess Serenity costume. I have wanted to make one for almost as long as I have wanted to make the senshi outfit. Since picking up the wig, I have been keeping an eye out for anything I could use for Serenity. Pearls are going to be a biggie. Also, anything with moons on them, of course. The wig is yellow, even though I would have preferred the white/silver one I have seen online. Authenticity would dictate that I go with gold accessories to go with the anime version, but I really dislike yellow/gold. I also feel that I have had my fill of gold/copper/brass metals with my Steampunk Sailor Mars. I think I will aim to have this one completed for spring, and the start of the convention season next year, and to coincide with the release of the new Sailor Moon next summer.

Princess (Approx. 13-16 years) and Neo-Queen Serentiy (mid-twenties?)

So, for now, I am doing my research into the different variations of Princess Serenity. I thought of doing Neo-Queen Serenity, because of the more mature look to her (and the fact that she would be closer to my age than the teen princess). But, I don't really like the crown, and the mermaid style of the dress would be too constrictive for my taste, not to mention the length would result in a very dirty hem, and would likely be stepped on and possibly torn. I think I will go with the just-to-the-floor length of the princess' dress...

Manga: Seems to attach to the dress. Anime: Floats on her shoulder.

One of the more difficult parts of the princess dress is the shoulders. Depending on the artwork, they are sometimes drawn as being attached to the dress, other times they are floating on the shoulders with no apparent means of attachment. I prefer attaching it to the dress so it stays in place. I saw several different ways that others had managed the "floating" sleeves, including using clear elastic, and I just didn't like it. I plan to do a poofy off the shoulder sleeve, with the front and back "swirls" attached over top. This means that the sleeves are in fact soft, not a hard shell that would be difficult to move in, and they could easily be attached to the dress itself. The manga version seems to have these attached sleeves, and I prefer the level of detail in the manga over the simplified anime version.


In keeping with the manga level of detail, I will have a lot of embellishments. With the heavy beading and trim on the bodice of this dress, but still wanting to keep it strapless, I will need a sturdy framework to support the weight. Boning inside the dress itself will keep things upright, but having a corset underneath it all will keep it where it should be. Once I finish the corset I am currently working on, I will make another one in white or flesh colour to wear under lighter coloured clothing. That will go well under the white dress of this costume, and provide the "scaffolding" so it stays where it should!

I am getting excited about this project! Eeee!!!! Ok, Christmas first, then cosplay!

Tuesday 20 November 2012

Pure Speculation 2012

Another year, another Pure Speculation Festival gone by. I don't know exactly how many years ago I attended my first Pure Spec event, but it was back in the days when it was tiny and held in a community hall near Argyll. I volunteered there for a few years, and then decided to attend as a paying patron. I have been going every year ever since. 

I love the community feel of this festival. I have been to conventions of the small and medium variety (I have not yet travelled to San Diego, Vancouver, or Toronto for the huge conventions), and I must say that the small cons are great! Rather than being in a huge room with five hundred other people, straining to see the slide show at the front of the room, you are in a small room, with perhaps a dozen or so fans, engaging in conversation with the guest. Everyone gets a chance to ask a question, or comment. You get face time with the guests. It really is refreshing. The guest list might not include names like William Shatner or Stan Lee, but they do bring industry insiders... authors, prop designers, comic artists, real people who do these things for a living, and can give you a peek inside their world. 

This year we didn't see as many cosplayers... which made me sad. I love costumes, and I love seeing other people's costumes. I get a bit shy in public, and don't often compliment others on their work, but I do see it and admire it. 

Of those who did dress up, there were a handful of us who participated in the costume contest. Steampunk, being very popular these last couple of years, was well represented! I was the only entry in the advanced category (where, oh where did the other artisans go?) The winner of the novice category was a Steampunk lady (I think her name was Amber, if I remember correctly). She had made her corset, and it was very nicely finished. There was one award for Judges discretion, that was given to a man for his clever "Steam assisted stake" for slaying of vampires and other such creatures of the night. There was also a "random assassin" from the game Assassin's Creed, and a Diesel Punk soldier. The trophies were in keeping with the zombie theme and were 'risen from the dead'. Mine had a sticker on the plate to reflect that it is now a costume trophy, a Pure Spec sticker on the pillar, and topped off with a Green Lantern figure. We fist bumped. One of the other trophies was topped with a pirate ship. Awesomness all 'round.

Fist Bumpin' mah Trophy

My camera, being big and heavy to carry all day, and being horribly out of character, was left at home for the day. It did not occur to me to take photos with my phone (duh!!) so I do not have photos of the other costumes... perhaps, if they are posted at www.purespec.org at some point, I can point people there.

I also picked up a pair of earrings from Weregeek that I had been eyeing for a few years.

Feel the power of the dice!

I do check to see how many people are actually visiting my pages here, and while there has been an increase of visitors, it is impossible to tell if people are coming here because they are interested in what I am posting, or if they came here by mistake and promptly left because this wasn't what they were looking for. Imagine my surprise to be recognised on Sunday, not once, but twice! And both people said "I read your blog". They read it! I am so accustomed to being the fan girl, not being the one with fans! So, here is a "shout out" to my two readers!! And Melissa, I have greatly admired your work for a long time, and to hear your praise for my own skills meant a great deal to me!

It was great running into friends at the various tables! Many great conversations were had, and I look forward to seeing you all again at the next con, though it is so far away...

Well, with the conventions all wrapped up for the year, I will get back to my non-costume sewing and other projects. I am still undecided on the next step for my corset... 

Friday 16 November 2012

Corset Design, Drafting, Construction Pt 3

My corset supplies arrived at the end of the summer, but with a couple other projects queued up before, I am now finally getting to the corset! I ordered a busk, spring steel bones (the flat ones, to put next to the laces for extra stability), and a coil of spiral steel and tips so I can cut the lengths myself. I also ordered a metre each of black and white herringbone coutil (the sturdy material for my strength layer, this is fabric specially designed for corset making and has no stretch). For my first one, I think I will make it with the black coutil, but I still  have time to make the final decision on the colour I plan to use for this first corset.

I want to state first of all, many of the tips and tricks I learned are thanks to Lucy and her wonderful Youtube videos on how to make corsets. Her instructions are excellent, and I do not wish to rehash them here. I will share my experience with following her instructions, as well as any other sources I my have found along the way. Where I have something to add to what is already existing, I will. So, the following will skip over some of the specific details in the actual construction:

First, I want to make a mock up. I keep my fabric in boxes sorted by colour, as that is usually how I determine what I am going to use. There are fabrics that I have that I would never use for a wearable garment, so I keep those in a separate box, regardless of colour. That is my "scrap bin". I will use these materials for linings, under garments (like petticoats), and mock ups. I found a light blue cotton with very little stretch (almost any fabric you find will have some small amount of give to it, even if it isn't "stretch" fabric). This will do for the mock up.

This is the line traced from the pattern piece. Seam allowance must be ADDED to these, as these lines will become my guides for sewing the pieces together. The idea is to sew exactly along the lines.

I cut out my pattern pieces. These are cut right to the actual dimensions of the final piece, and I have to add the seam allowances to them when I trace them out on the fabric. This is because I want to be able to trace the actual size, so I know EXACTLY where my sewing lines will be. Corset making is a very precise craft, and as Lucy says, 1-2mm added to each side of each piece, on a pattern with so many pieces, can add almost an inch to the total waist measurement!

You can see where the waist line is. I used that to line up the pieces when sewing them together, so I knew the waist would match up all the way around. I can always trim the top and bottom to create a smooth line later.

Important little tip - Something I learned many years ago: I number all my pieces and put an arrow pointing to the top of the corset. This makes sewing them together much easier. Once they are all cut out, it is hard to tell which piece goes where, and what direction they should go in. I have sewn a piece in upside down before, and it was a huge pain to take it out and put it back in. I also kept my left and right sides in separate piles so I didn't mix up my panels.

I did put a waist tape in the mock up. The fabric I am using is really cheap, flimsy, and has some stretch, and a waist tape would help keep the waist line as accurate as possible.

Once the pieces were sewn together, I had to make the boning channels. I just tacked down the seam allowance for this purpose. I used plastic boning I had left over from other projects. I won't cut my spirals until I know exactly what sizes I will need, and this is mock up so it doesn't need to be pretty!

With the left and right halves of the corset done, I can start doing the laces. I don't plan on using this for wearing, so I am not at all concerned about the grommets. And, at this point, I am feeling kinda lazy! So, I am using my punch, and I will just punch the holes out! No grommets! Lets see how well this works.... with the bones sandwiching the laces, I am hoping that they don't tear when I lace this up. I marked them 1" apart and used my punch to make all the holes. This was slow going, because the fabric is kind of flimsy, but much faster than hammering grommets!


I can now lay my corset out, lacing panels together, and start inserting my laces. For a great videos on different ways to lace your corsets, check out the videos on this Youtube Channel.

With the laces in place, I can now try on my mock up for the first time!

The shape I am going for is a little more dramatic that the gentle hourglass shape. This is because I want to have it as comfortable as possible in my ribs and hips. I have broad hips, and those won't move, no matter how small I make the corset. I also don't want much compression on my ribs, so I have designed the corset shape so it is snug around my ribs, with little reduction there. I will see how that feels.

The shape I am getting is

The top half of the corset has the peak in the front,  and comes up higher in the back. The bottom of the corset comes down right over my hips, and low over my lap. I did do a sit test to make sure that this was not going to dig into my legs! You can see it nips in at the waist, but otherwise follows the natural shape of my body to maximise comfort.
A side note, Pixel, my cat, decided to make a guest appearance.

There were a few things I wanted to change. I found it to be a little loose in the front over my tummy, and I wanted to change up the curve in the waist a little. I traced my pattern pieces onto a sheet of card, altered the lines where I felt was necessary (The original pieces are left un-altered, in case these changes don't do what I intended), and made another mockup.

I see more changes that I would like to make, but I think I have the overall shape down. 
The top back is a little loose and the gap isn't even all the way down.

So, overall, I am quite happy with the results. With the minor adjustment to the width of the back, I think I am ready to start cutting the actual materials for the final corset! I am still working up the guts to do it... the rational part of my brain tells me, "It is just fabric, you can buy more. Get over it." The perfectionist in my brain says, "One more mock up. No, just one more. Ok, just one more." Perfectionist, if I let you take over, I will NEVER have my corset finished! 

Please excuse me while I give myself a pep talk, and hopefully I will have a completed corset to share in a couple of weeks!